Requirement for creating an auto number field is very common & achieving them used to be very difficult or unsupported(using third party tools) . Now with Dynamics CRM 365, you can create an auto-number attribute very easily.
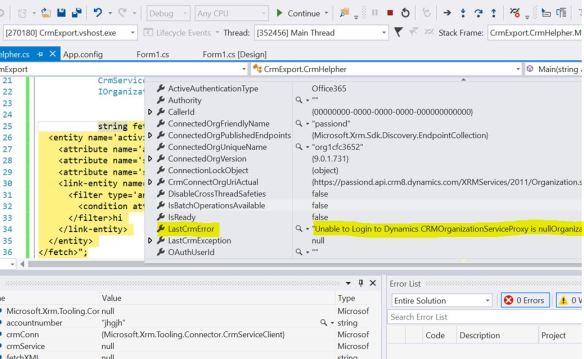
At this moment its not available in the UI , you will have to do it programmatically but its very less and easy code.
following the format which can be achieved :
| AutoNumberFormat value |
Example value |
CAR-{SEQNUM:3}-{RANDSTRING:6} |
CAR-123-AB7LSF |
CNR-{RANDSTRING:4}-{SEQNUM:4} |
CNR-WXYZ-1000 |
{SEQNUM:6}-#-{RANDSTRING:3} |
123456-#-R3V |
KA-{SEQNUM:4} |
KA-0001 |
{SEQNUM:10} |
1234567890 |
QUO-{SEQNUM:3}#{RANDSTRING:3}#{RANDSTRING:5} |
QUO-123#ABC#PQ2ST |
QUO-{SEQNUM:7}{RANDSTRING:5} |
QUO-0001000P9G3R |
CAS-{SEQNUM:6}-{RANDSTRING:6}-{DATETIMEUTC:yyyyMMddhhmmss} |
CAS-002000-S1P0H0-20170913091544 |
CAS-{SEQNUM:6}-{DATETIMEUTC:yyyyMMddhh}-{RANDSTRING:6} |
CAS-002002-2017091309-HTZOUR |
CAS-{SEQNUM:6}-{DATETIMEUTC:yyyyMM}-{RANDSTRING:6}-{DATETIMEUTC:hhmmss} |
CAS-002000-201709-Z8M2Z6-110901 |
lets see how this can be done , in this example i am giving my custom organization entity a serial auto numbered field. you can do this both by C# code or Webapi :
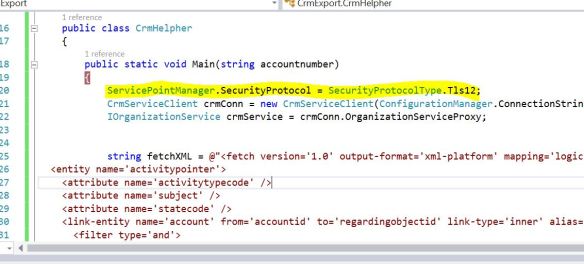
C#
CreateAttributeRequest widgetSerialNumberAttributeRequest = new CreateAttributeRequest

            {
             EntityName = "new_organization",
             Attribute = new StringAttributeMetadata
                {

                    //Define the format of the attribute

                    AutoNumberFormat = "ORG-{SEQNUM:3}-{RANDSTRING:6} ",
                    LogicalName = "new_serialnumber",
                    SchemaName = "new_SerialNumber",
                    RequiredLevel = new AttributeRequiredLevelManagedProperty(AttributeRequiredLevel.None),
                    MaxLength = 100, // The MaxLength defined for the string attribute must be greater than the length of the AutoNumberFormat value, that is, it should be able to fit in the generated value.
                    DisplayName = new Microsoft.Xrm.Sdk.Label("Serial Number", 1033),
                    Description = new Microsoft.Xrm.Sdk.Label("Serial Number of the widget.", 1033)
                }

            };
            crmService.Execute(widgetSerialNumberAttributeRequest);
As you can see in my request i have given AutoNumberFormat as ORG-{SEQNUM:3}-{RANDSTRING:6} from the List.
in case you need the full code:
using System;

using System.ServiceModel;

using Microsoft.Xrm.Sdk;

using Microsoft.Xrm.Sdk.Metadata;

using Microsoft.Xrm.Sdk.Messages;


amespace Microsoft.Crm.Sdk.Samples

    {

        public class FollowupPlugin : IPlugin

        {
            public void Execute(IServiceProvider serviceProvider)
            {
                //Extract the tracing service for use in debugging sandboxed plug-ins.
                ITracingService tracingService =

                    (ITracingService)serviceProvider.GetService(typeof(ITracingService));
               // Obtain the execution context from the service provider.

                IPluginExecutionContext context = (IPluginExecutionContext)
                    serviceProvider.GetService(typeof(IPluginExecutionContext));


            CreateAttributeRequest widgetSerialNumberAttributeRequest = new CreateAttributeRequest
            {

                EntityName = "new_organization",
                Attribute = new StringAttributeMetadata

                {
                    //Define the format of the attribute
                    AutoNumberFormat = "ORG-{SEQNUM:3}-{RANDSTRING:6}  ",
                    LogicalName = "new_serialnumber",
                    SchemaName = "new_SerialNumber",
                    RequiredLevel = new AttributeRequiredLevelManagedProperty(AttributeRequiredLevel.None),
                    MaxLength = 100, // The MaxLength defined for the string attribute must be greater than the length of the AutoNumberFormat value, that is, it should be able to fit in the generated value.
                    DisplayName = new Microsoft.Xrm.Sdk.Label("Serial Number", 1033),
                    Description = new Microsoft.Xrm.Sdk.Label("Serial Number of the widget.", 1033)
                }
            };

            crmService.Execute(widgetSerialNumberAttributeRequest);
       }

    }
WebAPI
{
 "AttributeType": "String",
 "AttributeTypeName": {
  "Value": "StringType"
 },

 "Description": {
  "@odata.type": "Microsoft.Dynamics.CRM.Label",
  "LocalizedLabels": [
   {
   "@odata.type": "Microsoft.Dynamics.CRM.LocalizedLabel",
    "Label": "Serial Number of the widget.",
   "LanguageCode": 1033
   }
  ]
 },

 "DisplayName": {
  "@odata.type": "Microsoft.Dynamics.CRM.Label",
  "LocalizedLabels": [
   {
    "@odata.type": "Microsoft.Dynamics.CRM.LocalizedLabel",
    "Label": "Serial Number",
    "LanguageCode": 1033
   }
  ]
 },

 "RequiredLevel": {
  "Value": "None",
  "CanBeChanged": true,
  "ManagedPropertyLogicalName": "canmodifyrequirementlevelsettings"
 },

 "SchemaName": "new_SerialNumber",
 "AutoNumberFormat": "WID-{SEQNUM:5}-{RANDSTRING:6}-{DATETIMEUTC:yyyyMMddhhmmss}",
 "@odata.type": "Microsoft.Dynamics.CRM.StringAttributeMetadata",
 "FormatName": {
  "Value": "Text"
},
 "MaxLength": 100
}
You just have to pass certain headers in the API request such as Content -Type , Application as JSON and the authentication.
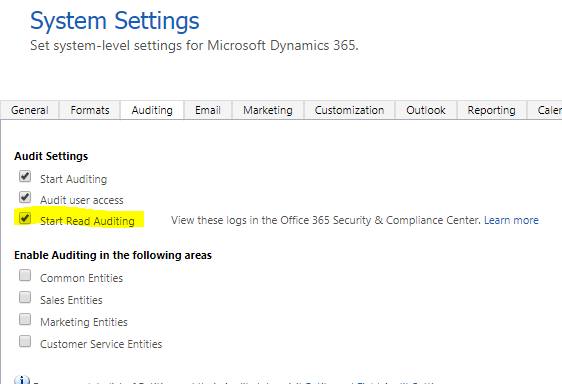
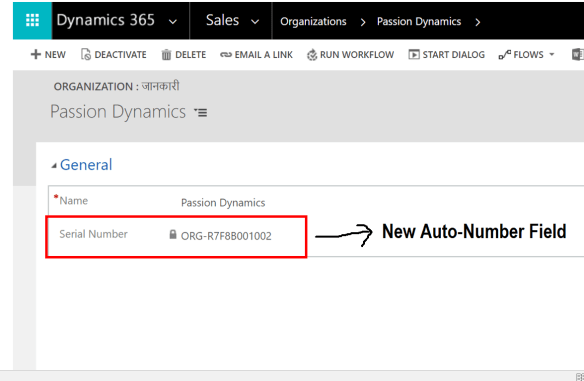
Once you have done this – you will see a a new field as new_serialnumber has been created in the system under new entity. Few things:
- Put the field on the form
- it will be a locked field
- it will generate a new number everytime you click on save
it will be something like below:
I hope this helps!