Enable Add New(+) Connection Button On Opportunity

Out of the box on opportunity form, we have a connection sub grid named “stakeholders”. You can add new connections of type stakeholder from this subgrid which is amazing , however what if we need ability to create any other type connections from opportunity. 

Connections ofcourse has inbuilt functionality for opportunity to behave this way.
The subgrid uses a default view “All Stakeholders” hence it will let you add only stakeholder connections. 

Let’s change this view to “All Active Connections” :

Select this view, save changes & publish the form. Lets see what happens now:

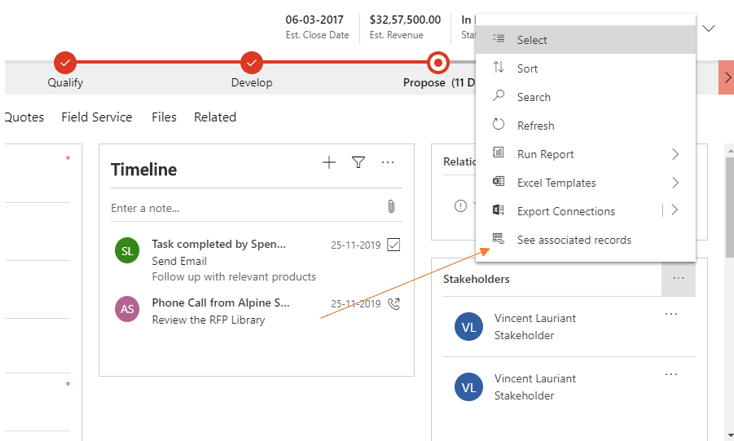
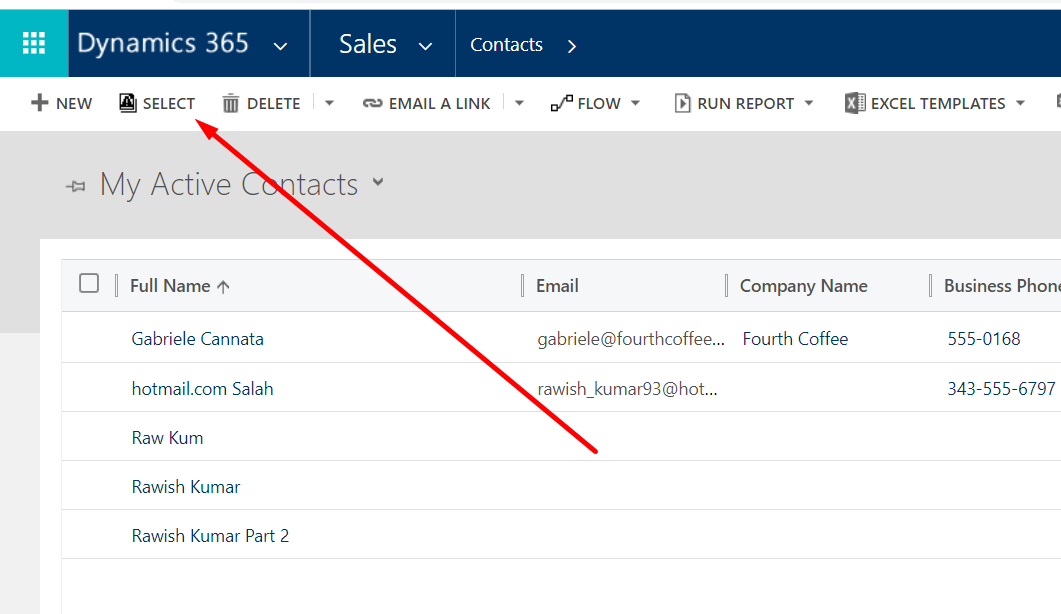
Strangely, we dont have a plus button , so person will have to click on see all records/see associated record and then add the connections from.

Solution:

I have found a workaround by playing around the ribbon workbench. 
1. To do this, create a temporary solution and add “connections” entity to it. 

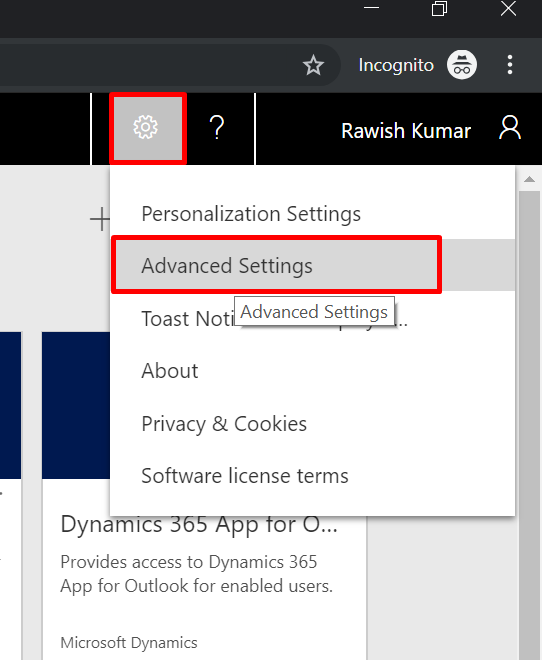
2. Next step is to install ribbon workbench if you dont have already. You can get it from here:
https://www.develop1.net/public/rwb/ribbonworkbench.aspx  

3. Once you have download the solution, install the solution to your dynamics 365 instance.


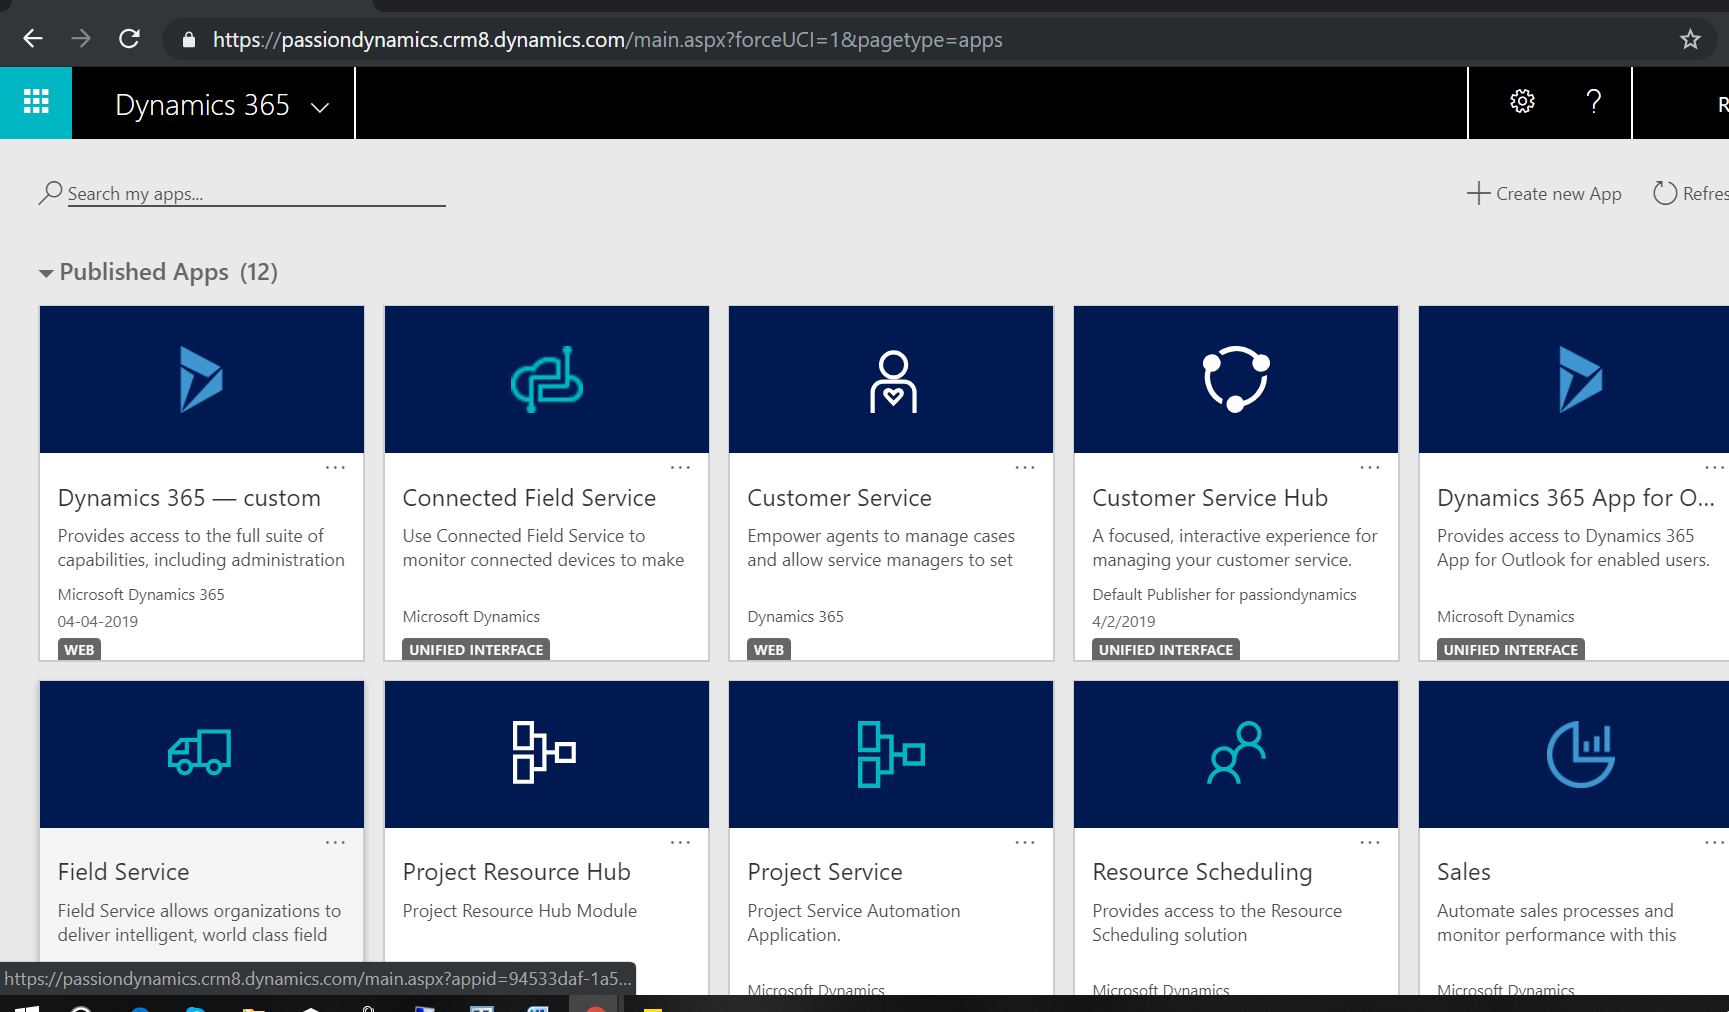
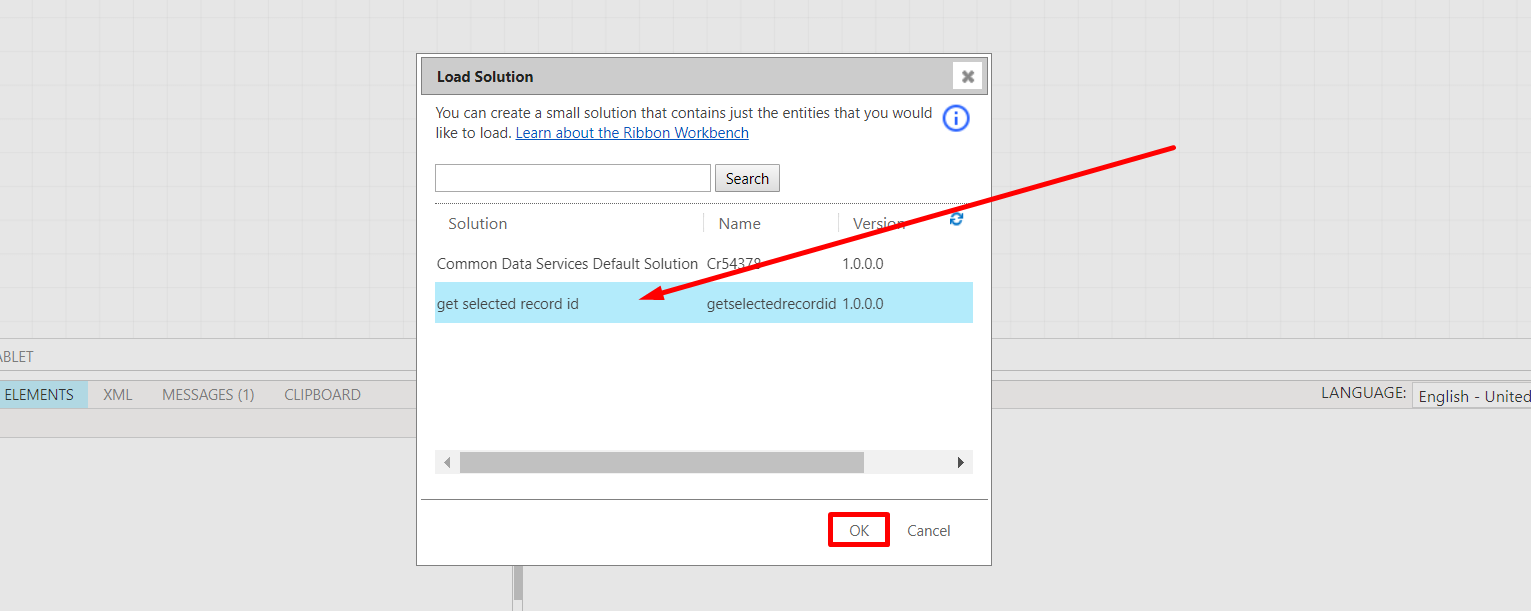
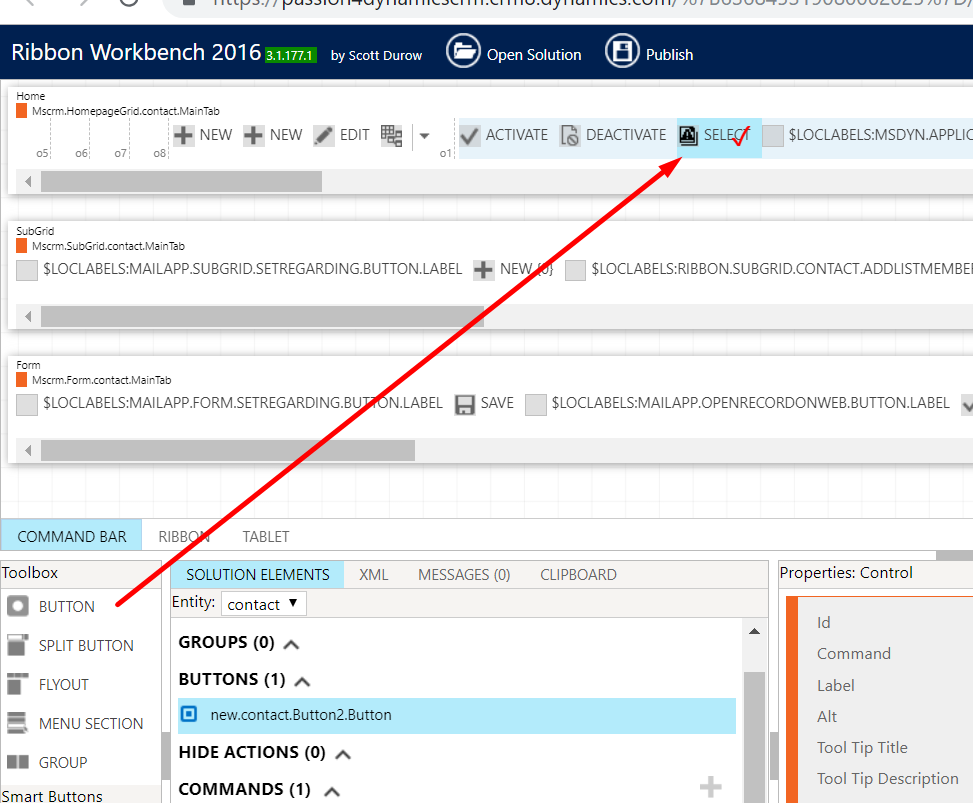
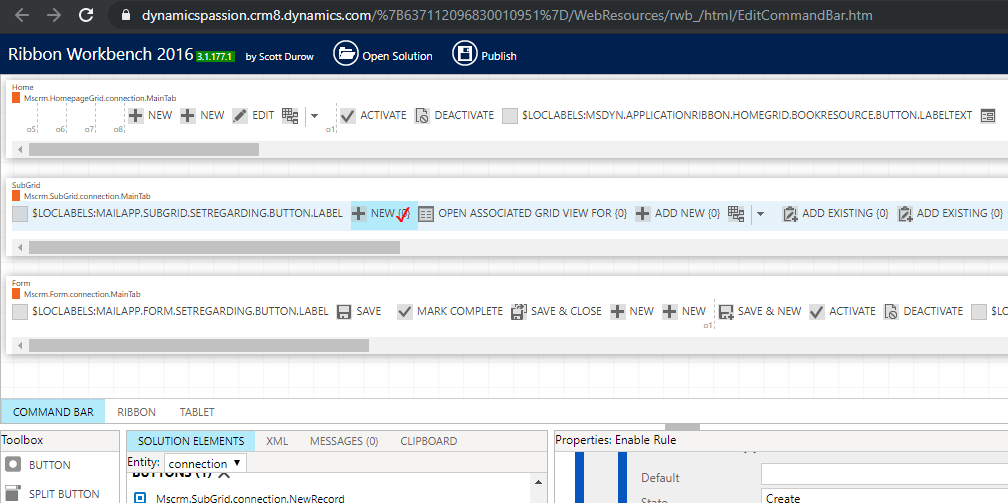
4. Click on the ribbon workbench button from your solutions are and select the newly create solution in the popup ( which we create for connection entity):

We are now going to make some ribbon changes, i would recommend to take a backup of the newly solution we have created so if anything goes wrong we can always import it back.

5. Right click on the +New button the subgrid ribbon and right on it. 
 Select “customize button” then again right click and select “Customize command”:

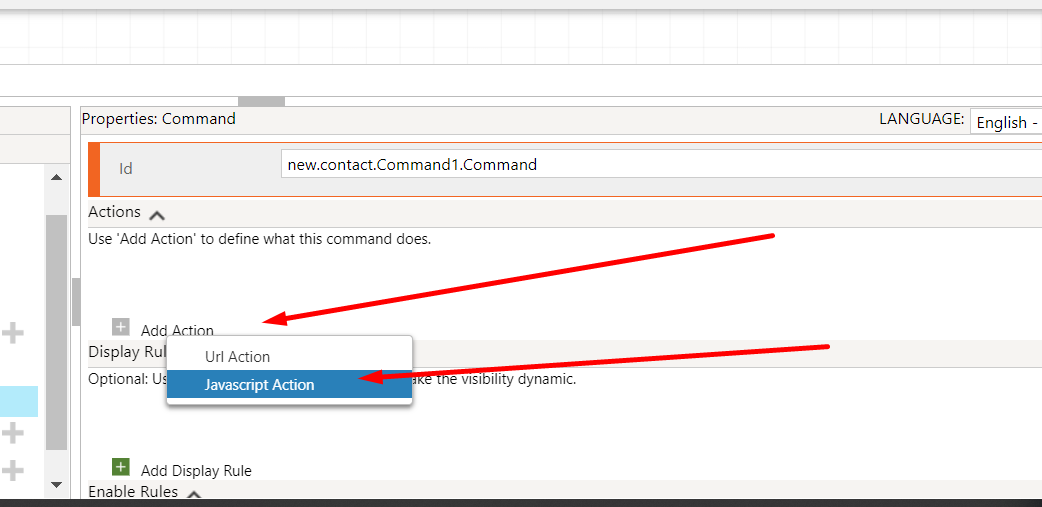
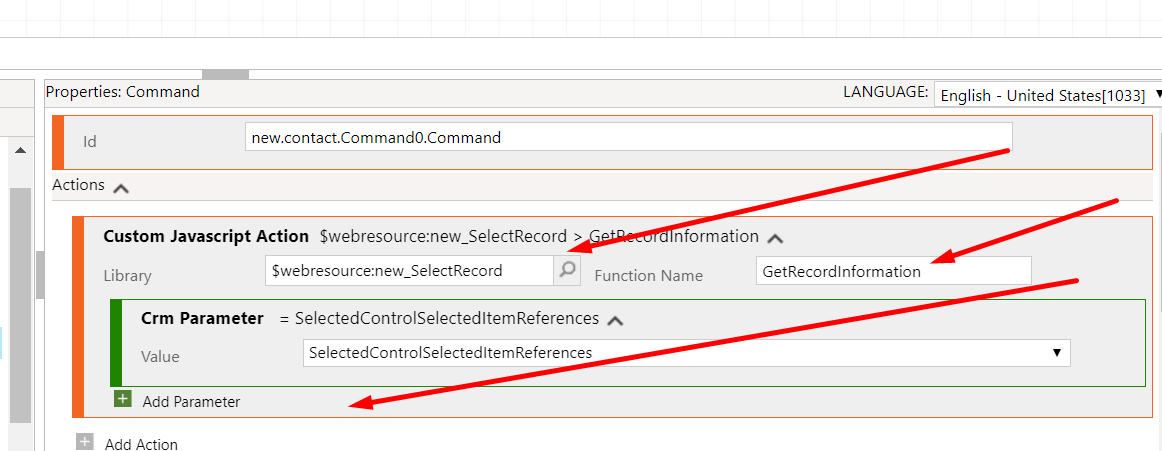
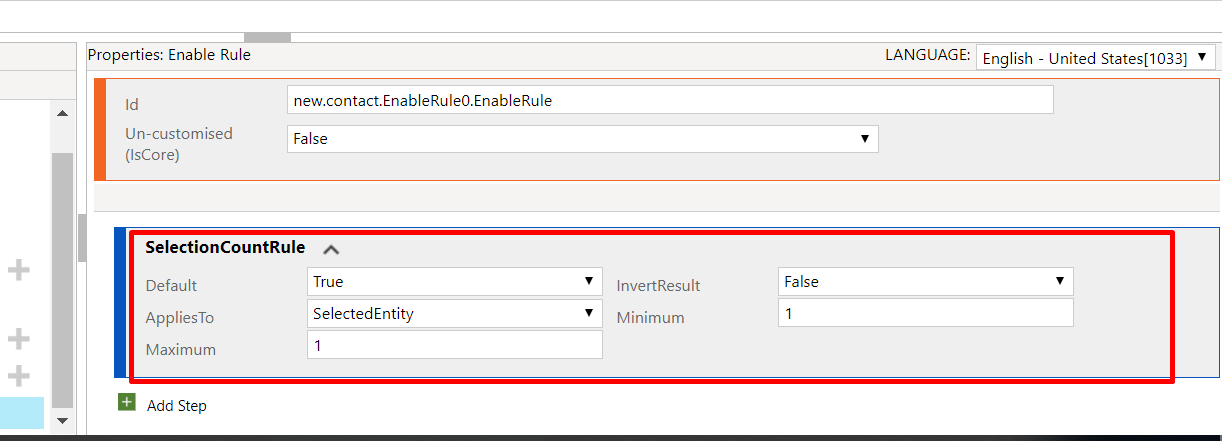
6. Now move to the enable rule “Mscrm.ShowOnHomeGridAndOnSalesCustomSubGrids” under command “Mscrm.SubGrid.connection.NewRecord” & scroll down to the “Custom rule” as shown below.

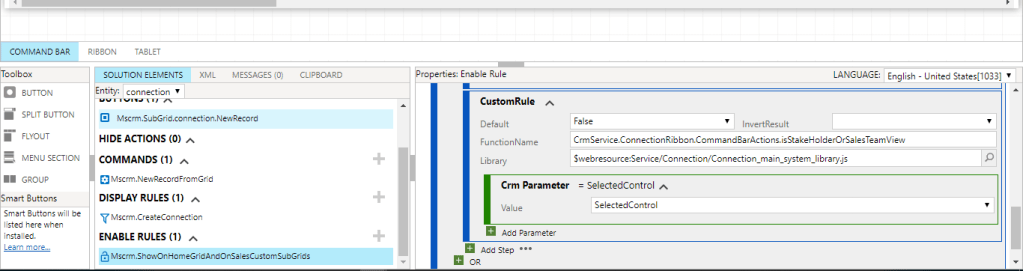
7. In this rule make “Default” field to “true” as well as Invert rule to true as well:

8. Now click on publish button from the ribbon workbench which will take some time.

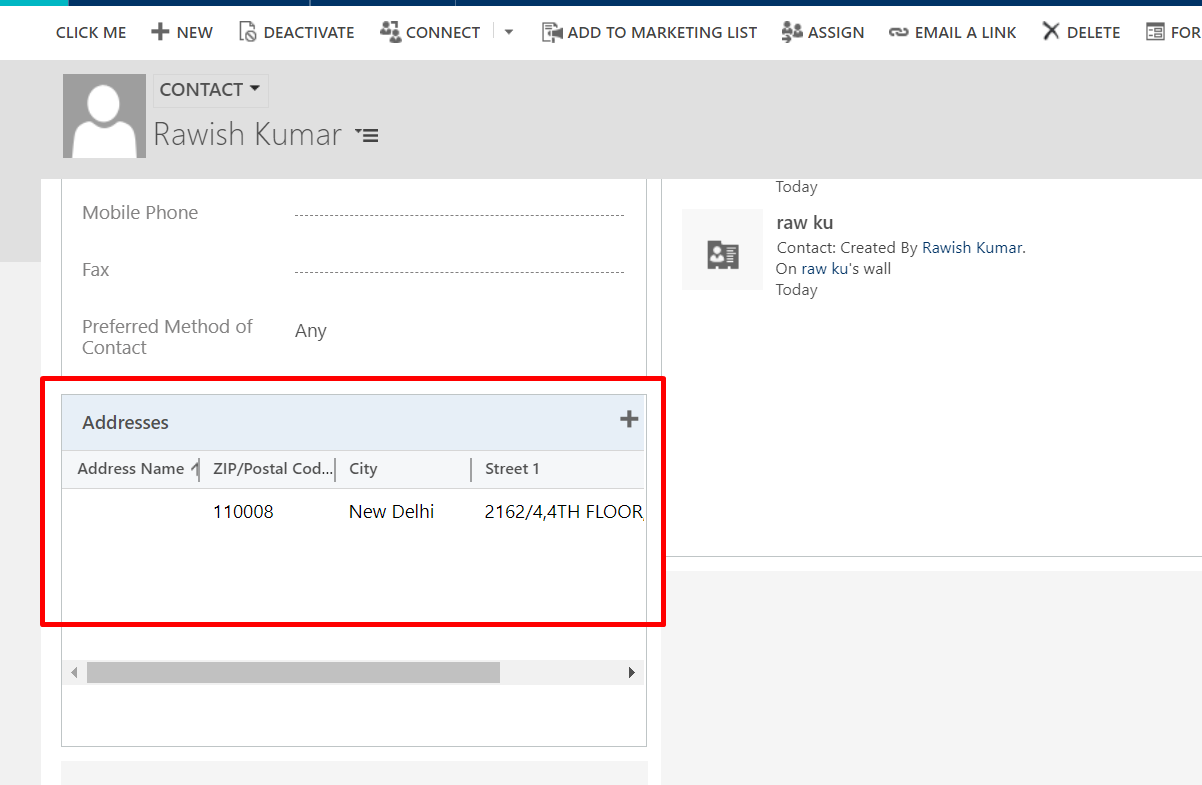
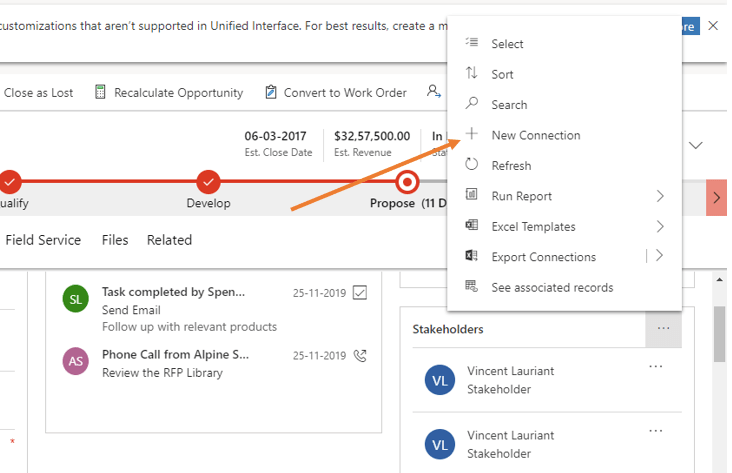
9. Navigate to your opportunity now and you will the + button from subgrid now:


I hope this helps, here are some final notes:

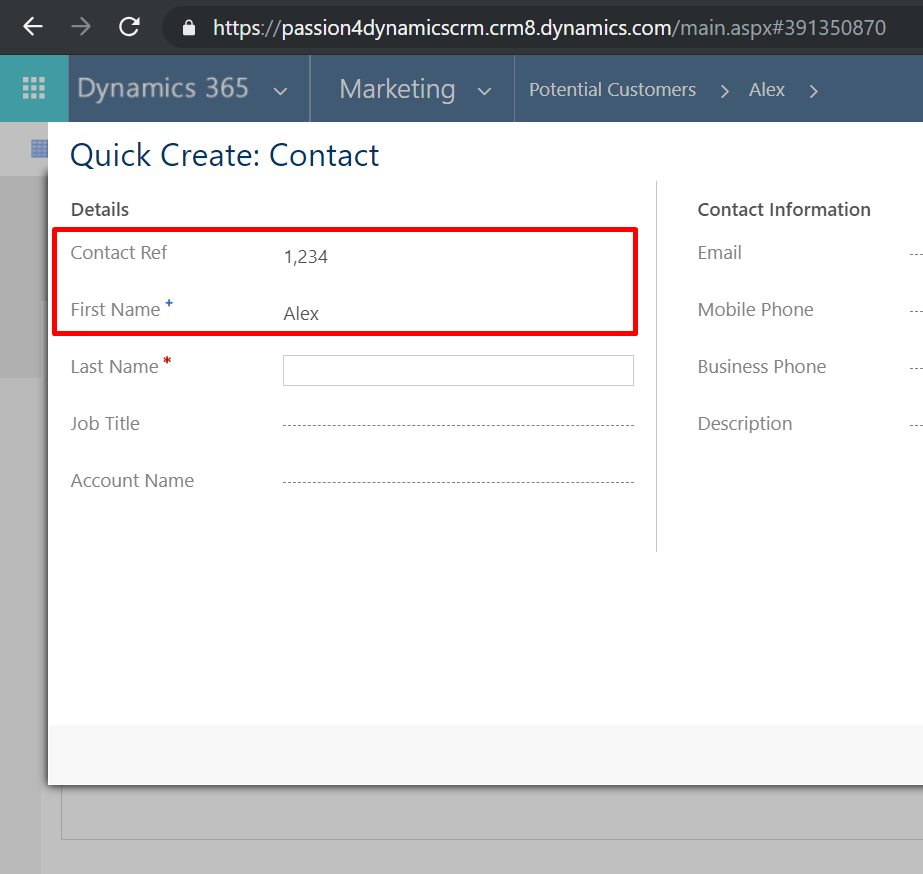
  1. Connections entity doesnt support quick create form hence do not expect it open a quick create on the right side when you click on this button.  It will open a new window , you have fill details and click on save & close.
  2. When new connection screen opens it will have opportunity in both connected to and connected from fields. You will have to apply basic javascript to clear one of the field so that user can select the customer /account in connected to field.
  3. Connections do not support business rule.

Cheers!

Advertisement

Dynamics 365 Latest API Limits

Surprise!!
Have a look and plan things accordingly.

1
below link has full information : https://docs.microsoft.com/en-ca/power-platform/admin/api-request-limits-allocations

Getting Anonymous Survey Response Consistently When Using Email Snippet – VOC

Quick Post.

Recently when designing/creating surveys in Voice Of Customer. I faced this issue of getting anonymous response if I am using email snippet from the survey. Expectation is when you use Email Snippet copied from a survey and put it in an email and send it. Customer fills the survey, you should have the customer/respondent details.

1

Which means you have to generate survey activities first and copy the direct URL from there and send it but its not what you would want to do every time.

Resolution

This seems to be a bug in the Voice of Customer Version 1.0.0.0/9.0.1188.4. So please check if you are facing the issue and version is same. Please upgrade it to the latest version. 1.0.0.1/9.0.1438.4. 

Doing above resolved my issue and I could see the responses properly.

hope this helps!

Email Template Demystified

Before I start this blog – I would like to mention that my previous blog on email template functionality How to insert dynamic values from custom entities in an email template – Microsoft Dynamics CRM has been a huge success and got 10K + views on both Dynamics Community and on my personal blog.

In this blog I am going to cover below:

  1. Using HTML in email template. I.e Adding a table, border etc.
  2. Adding images to email template, prerequisites, limitation etc
  3. Using desired fonts


Quick Tips:
1. Always use Internet Explorer when creating email template
2. Adjust IE settings to be in compatible mode with your CRM. (i.e adding CRM url to compatibility mode)


Using HTML in email template. I.e Adding a table, border etc..

The first question would be , what is the need to use html in email template? If you know email template has very limited option available from the designer such as limited number of fonts, Colors, font size etc. So using html to provide rich look to your email content can be a good choice. I have used them personally and customer loved them.

In this blog I will quickly create a basic html email template which will have a table with some information from CRM record and we will beautify it. Lets say i would like to create table with custom loyalty reward information. I can do something like below:


You can use any online html editor to create the required content like the one I used here: https://html-online.com/editor/  

Now save the template and go to a contact > activities > add an email and insert this email template:


This is just to show the capability. You can do a lot with HTML in your email template.

Adding images to email template, prerequisites, limitation etc.

Adding images to a email template has been very tidy work. However with correct knowledge its quiet easy.  Keep below in your mind when you want to add an image to an email template:

  1. Email template is not a container/storage. The image can only be referenced from a public source. Meaning image must be available/accessible public ally.  i.e located on sharePoint, company website, social network public image etc.
  2. You should set the image size using html rather then manually dragging the corners.

Lets take an example below. I would add an image to my email template showing my recent accomplishment which is available on my blog page:


Now if I need this image in email template. There are two options.

1. Copy the image directly by right clicking on the image from website or create an html using image. Open in browser and copy from there and paste in your email template:

however this method is risky as your image might vanish anytime.

2. Copy image hyperlink or image address and paste it and create html by proving the image source:


Save the template and insert into email and you will see image has been populated.

Quick Tip : You can store images as Image web resource within your dynamics CRM and use them like I have used above by simply taking the image web resource url.

Using desired fonts

Though template editor gives you very limited option on fonts and size. You can very add other fonts and desired size or any colour to your content.


Here is what you can do:

  1. Format your content on a word document and copy paste from there into your email template. It should retain the fonts, size and color.
  2. Set the formatting within your HTML.


<p><strong><span style="color: #ff0000;"> Rawish Kumar</span></strong></p>
  

I hope this helps!

Feel free to contact me in case of any difficulties.

Alternate Key Creation – Stuck On Pending Status

Alternate key is a great addition to useful features in dynamics crm. I have blogged about it here : Work With Alternate Keys

In this blog I just want to quickly show resolution when you create an alternate key and its corresponding job stays in “Pending” Status.

I.e Consider an example of my entity. On my customer entity I have a contact reference field  which I would like to be unique. hence I decide to create an alternate key. So I go to Settings > Customizations > Customize the System > Entity > My Enity > Key and create a new one by adding the contact reference field:

  1. Create new alternate key and add the required field:
  2. Click Save and Close. you will see job is created and shows you status. However even after waiting for minutes , it shows as “Pending” the expect status should be “Activated”.
  3. click on the job:
  4. But there also , you wont see anything 😦

Reason & Resolution

There are two possibilities:

  1. Since creating an alternate key essentially creates indexing on the table in the database. It will fail if duplicate records are already there.To remove duplicates either use advanced find to manually delete or update records or duplicate detection job to delete the record, see here :Set up duplicate detection rules to keep your data clean
  2. Other reason I can think of is the job is stuck may be due to some CRM Async Service. Try to delete and recreated the alternate key.
    If you are onpremise – you can restart async service and see if that works.

For me 1st one was the issue. I deleted the records with same contact reference number and it worked:

Now I could create the key and it was activated:

I hope this helps!

Populate Data From Child Record To Parent Record’s Quick Create Form In Dynamics 365

Populating data on forms in CRM is not a headache since you can do mappings for your 1:N record or simply do a Web API request using the parent lookup exist on the new form to retrieve the values from that record and set them on the current form.

However what if you have to populate data on a parent record form from a child record form? there is no out of the box functionality or script available for this. I digged in further and found below method. Its a rare but an important requirement. 

  1. I have an entity named “Potential Customer” which has a lookup of Contact along with some other fields such as name, contact ref number etc. My requirement is to pass name and contact ref from potential customer to contact on quick create form:
  2. Here are the two field below the parent contact lookup which I would like to be propagated to contact quick create form:
  3. To achieve this, I have used a concept of localStorage property.
  4. Create below javascript resource and add to your child record form( from where you will add new parent record) in my case its potential customer:
function SetLocalStorage(executionContext)
{

var formContext = executionContext.getFormContext();
var firstName = formContext.getControl("new_name").getAttribute().getValue().toString();
var refNumber = formContext.getControl("new_contactrefnumber").getAttribute().getValue();

localStorage.setItem("FirstName",firstName );
localStorage.setItem("ContactRef",refNumber );

}

In the code above I am simply retrieving the value from current record on load event and setting it to the localStorage. You have to set value using a key and the value. so from code below; FirstName is the key(using which we will retrieve the value) and firstName variable is the value.

localStorage.setItem(“FirstName”,firstName );

       
         5. Now add below code to your onload quick create form of the parent record in my case its contact.         

function RetrieveStorageValue(executionContext)
{
debugger;
var formContext = executionContext.getFormContext();
var firstName = localStorage.getItem("FirstName");
var contactRef = localStorage.getItem("ContactRef");

formContext.getAttribute("firstname").setValue(firstName);
formContext.getAttribute("new_contactref").setValue(contactRef);

localStorage.removeItem("FirstName");
localStorage.removeItem("ContactRef");

}

In the above code i am simply retrieving the value set using localStorage.getItem(“KeyName”); and then setting it on the required fields.

Use this link explained very well by Neil on how to add javascript code to your form : JS Basics

So now when Click on the new button from the lookup dropdown to add a parent record , I get values populated:


Here you go! 

Few important points:  

  1. I don’t encourage using properties and methods which are not defined by/for Microsoft dynamics CRM.
  2. The data you add to localStorage doesn’t have expiration which means the data will be there unless you don’t clear it (hence in my code I clear it everything once I have  used the values)
  3. It is just one of the methods (sometimes referred to as “Unsupported”) to achieve this requirement.
  4. The above script is for Dynamics crm 365 v9 or above. Please use Xrm.Page instead of formContext if you wish to implement this in earlier versions.


I hope this helps! 

Get User’s Teams Using WebApi JavaScript In Dynamics 365

If you need to get current/logged in or of any other user’s all teams. You have to look for the N:N relationship schema name and use that association in WebApi request:

1

So below is the code you can use to achieve this requirement. I have just retrieving the name of the teams associated and putting an alert on Onload of a form.

I have generated the code using Rest Builder Tool . And added the filter ($filter=systemuserid eq  IdOfTheuser) manually.

function GetUserTeams()
{
    var userSettings = Xrm.Utility.getGlobalContext().userSettings; // userSettings is an object with user information.
    var current_User_Id = userSettings.userId; // The user's unique id
    var newid = current_User_Id.slice(1, -1);	
    var req = new XMLHttpRequest();
req.open("GET", Xrm.Page.context.getClientUrl() + "/api/data/v9.1/teams?$select=name&$expand=teammembership_association($filter=systemuserid eq "+newid+")", true);
req.setRequestHeader("OData-MaxVersion", "4.0");
req.setRequestHeader("OData-Version", "4.0");
req.setRequestHeader("Accept", "application/json");
req.setRequestHeader("Content-Type", "application/json; charset=utf-8");
req.setRequestHeader("Prefer", "odata.include-annotations=\"*\"");
req.onreadystatechange = function() {
    if (this.readyState === 4) {
        req.onreadystatechange = null;
        if (this.status === 200) {
            var results = JSON.parse(this.response);
            for (var i = 0; i < results.value.length; i++) {
                var name = results.value[i]["name"];
                             
                alert(name);
            }
        } else {
            Xrm.Utility.alertDialog(this.statusText);
        }
    }
};
req.send();
}

I am calling the function on Onload event of lead record. My user has two teams associated to it:

1


2


Important – Make sure you format the code fully before you use it. i.e use the latest method in the script i.e not using Xrm.Page but rather the formContext for v9.

I hope this helps! Cheers!


Get Selected Record Information From Main View Or A Subgrid In Dynamics 365

I recently had a requirement to get selected record id from a main view of an entity i.e. Home page view of an entity and also on a subgrid within the form.

I also needed to pass this ID to my action to do some further operations in the plugin. This is how I did

I have taken reference from  here  and here.

  1. Download the managed solution of Ribbon Workbench from here and import it to your Dynamics CRM 365 environment: https://www.develop1.net/public/rwb/ribbonworkbench.aspx
  2. Create an unmanaged  solution and add contact entity to it. ( I am taking contact entity as I need to perform action on that, you can select any entity)
  3. Create two JPG images web resource with sizes as 16×16 and 32×32 for your ribbon button. You can take the desired image and rescale it online.
  4. Create a javascript web resource and below code to it:
    function GetRecordInformation(item)
    {
        var selectedItem = item[0];
       alert("You have Select Record with Id=" + selectedItem.Id + "\nName=" 
    	+ selectedItem.Name + "\nEntity Type Code=" + selectedItem.TypeCode.toString() + "\nEntity=" + selectedItem.TypeName);
    }
  5. Publish all your customization and open ribbon workbench tool from your solution area and select the solution that you have created and click ok:1.png
  6. Now drag and drop a button to the home grid view:1.png
  7. I have named this button as “SELECT” from the button properties you will get once you add and select the button on bottom right side of the ribbon workbench also select the Image for you button by providing the web resources we created in step 3 :1
  8. Now that out button is ready, we need to add a command and enable rule to it. to do this from the solution component area click on commands and click on + button and then from the right side click on add “Action”  and then click on “Javascript action”:1.png
  9. Add your javascript resource by searching in the lookup, if you dont find the script( i faced the issue). Simply add $webresource:WebResourceName for me its $webresource:new_SelectRecord  
  10. In the next box – add the function name i.e for me its GetRecordInformation
  11. Then click on Add parameter and select SelectedControlSelectedItemReferences Parameter. It should look like below:

    1

  12. The final step is to add an enable rule to this command. To do this – from the solution component area click on Enable Rules and click on + button. On your right side you will be presented with below, Make sure you keep the information as it is:1
  13. We are done , now click on Publish from the ribbon. wait for it to completed as it might take some time. Once done navigate to your dynamics CRM and the main entity home view, you should see the button:1.png
  14. Select a record and click on the button and Bammmm! if everything goes right you will get the record information.1

You can do the same thing on a form subgrid, all you have to do is place the button on a form grid instead of home view.

I needed to further processing with the data so I called an action and passed the record id described here : http://sacconsulting.blogspot.com/2017/03/how-to-call-global-action-from.html

I hope this has been helpful!