Just a short blog on how you can use an application user or clientId & secret while using scribe integration for connection to Microsoft Dynamics Customer Engagement.
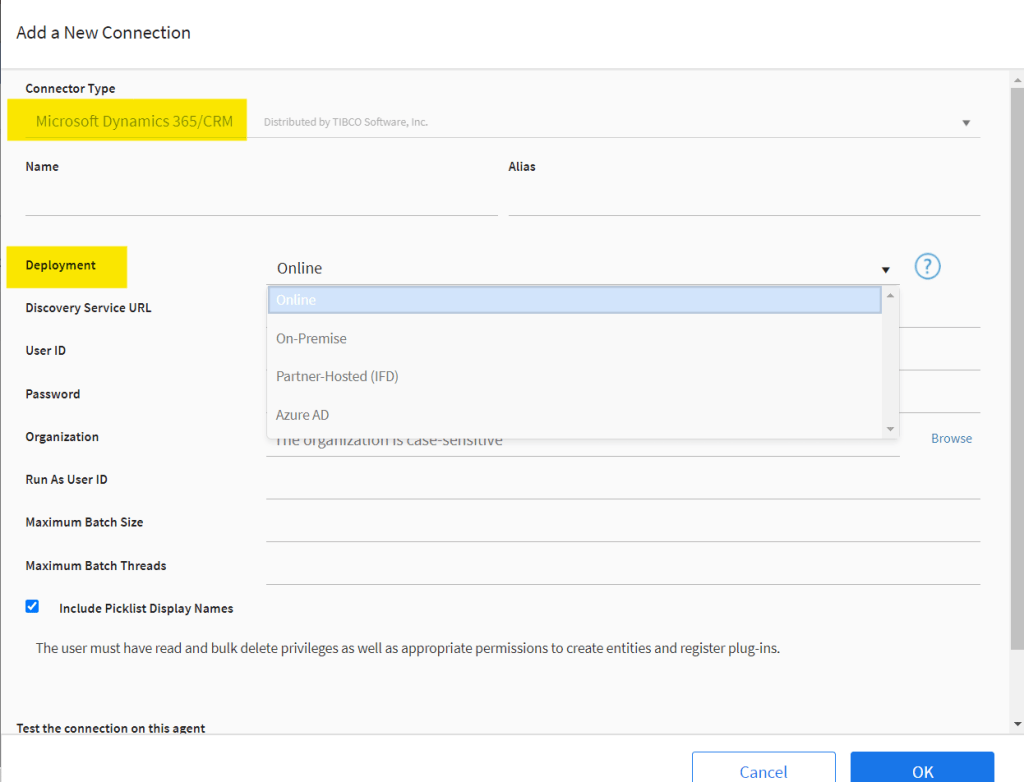
The only option remains is to use an application user which allows much much more number of request in 24 hours you can make. So, if you add a connector named as Microsoft Dynamics 365/CRM in scribe, you will see below:
So, you wont get option to use a client secret but all other option.
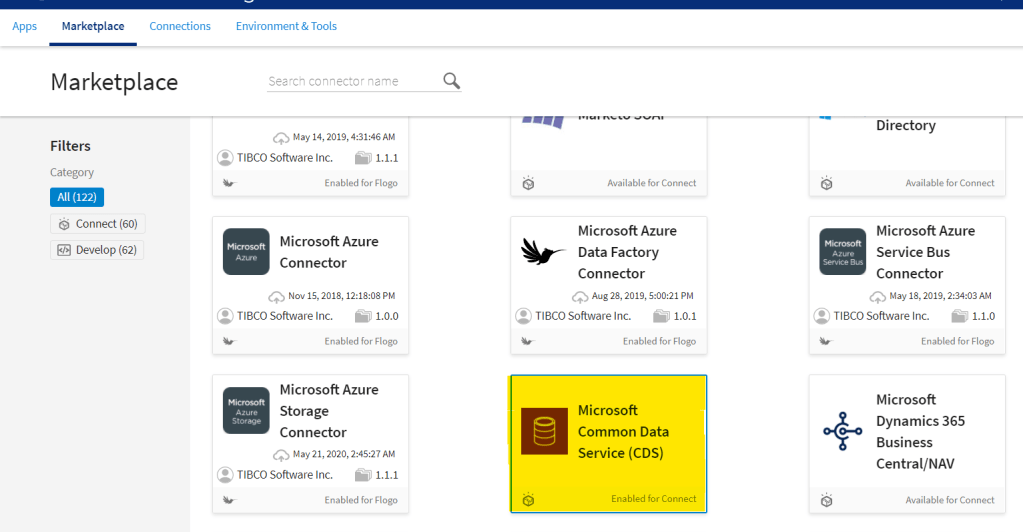
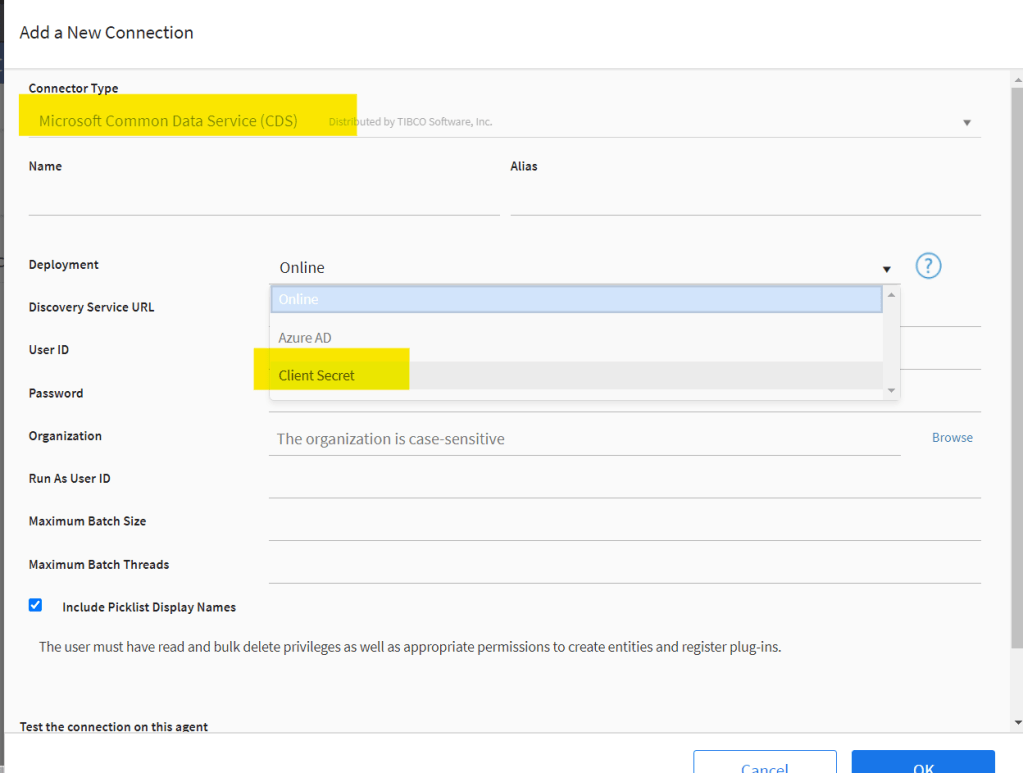
Solution : Make sure you are using the connection as Common Data Service (CDS) and post that when you connect, you will get the option:
Dynamics 365 has these special lookup fields which can reference multiple entities. Meaning, you can select record not just from one entity but other as well. One of the typical example is an Owner field where you chose a user or a team as well, A customer field where you can chose an account or a contact as well.
These fields have sister string fields which holds the entity schema name of the record in the main lookup field. i.e. for ownerid field, it will be owneridtype where it will be “systemuser” if owner is an user or “team” if team is the owner. These fields are often referred to as Virtual fields as well.
In my case, I will be talking about Notes(Annotation) Entity. Notes can be associated with any entity in the system using the objectid or regarding field to be clear. The corresponding field for this lookup field is objectidtypecode which holds the target entity schema name.
if you simply do the mapping to objectid in your target dynamics instance, you will error like below:
Operation on target Create Annotation failed: Failure happened on 'Sink' side. ErrorCode=DynamicsMissingTargetForMultiTargetLookupField,'Type=Microsoft.DataTransfer.Common.Shared.HybridDeliveryException,Message=Cannot find the target column for multi-target lookup field: 'objectid'.,Source=Microsoft.DataTransfer.ClientLibrary.DynamicsPlugin,'
Even if you map objectidtypecode to objectidtypecode directly, you will get error.
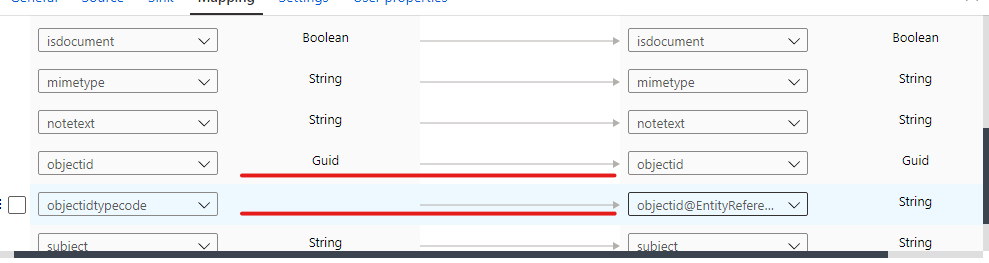
Solution: It was not possible to work with multi target fields at all earlier with ADF but now its possible by doing below. so now, you will have to map objectid to objectid(the main lookup field) from source to target. Along with that, you have to map objectidtypecode or any field which holds the schema name of the lookup field to an expression as “{lookup_field}@EntityReference”. So in my case it will be objectid@EntityReference.:
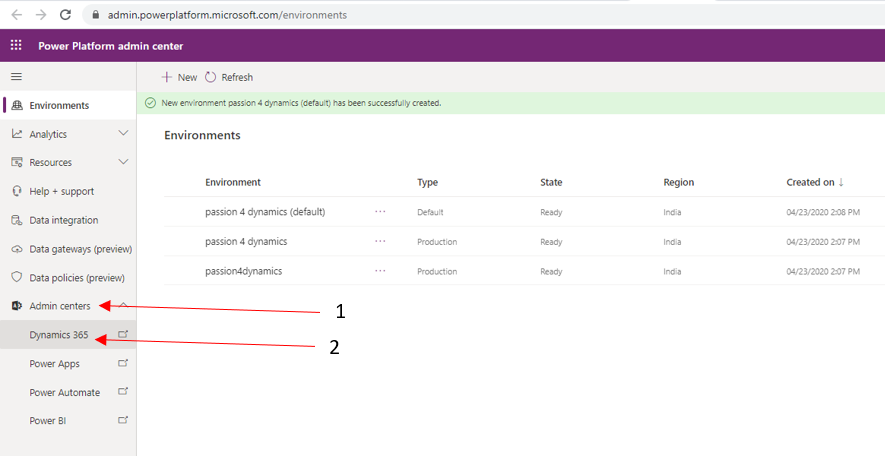
Here is the step by step process for adding Dynamics 365 Marketing to your dynamics 365 instance. You can sign up for, install, and use a trial version of Dynamics 365 Marketing for free. Trials last for 30 days.
Few important points to remember :
You will receive a trial Dynamics 365 instance together with your Marketing trial. You must run the Marketing trial on a trial instance, and can’t install it on a production instance.
You can’t convert a trial instance into a production instance.
You can install, at most, one Dynamics 365 Marketing trial per Microsoft 365 tenant.
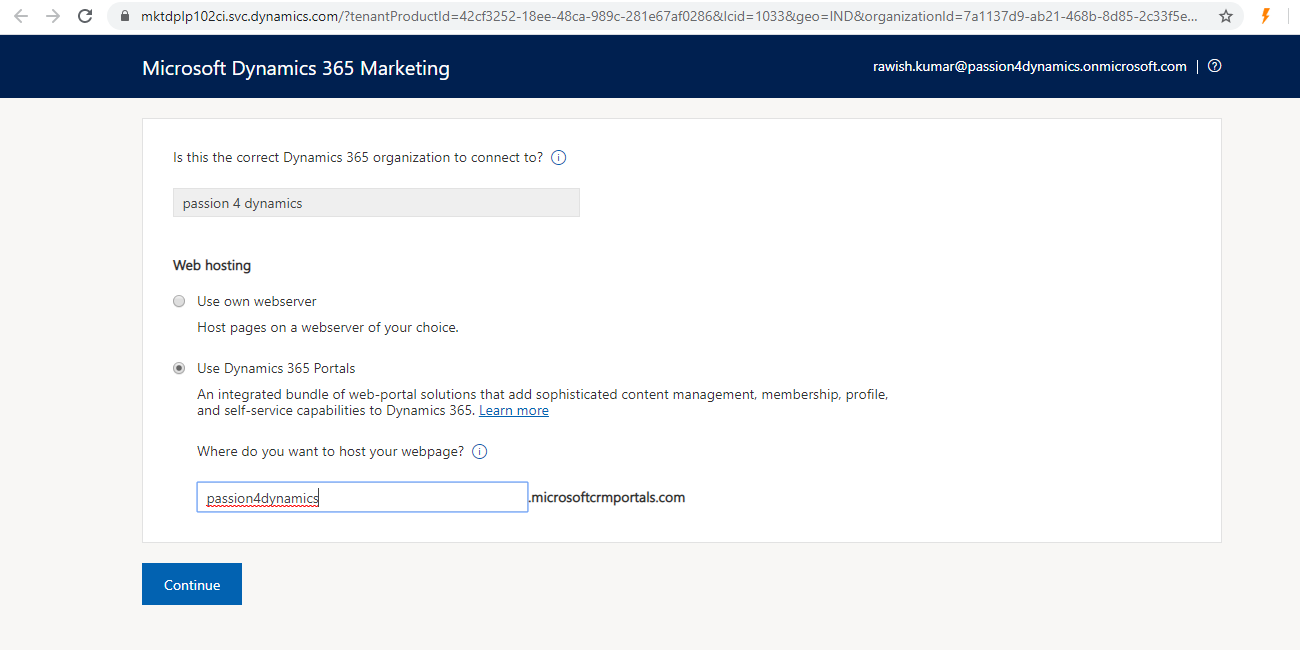
On the next screen you will be asked to provide a portal name, Please note that a portal is needed to host your pages which can be accessed by customers publically. In this installation a portal of type “Events” will be created for us.
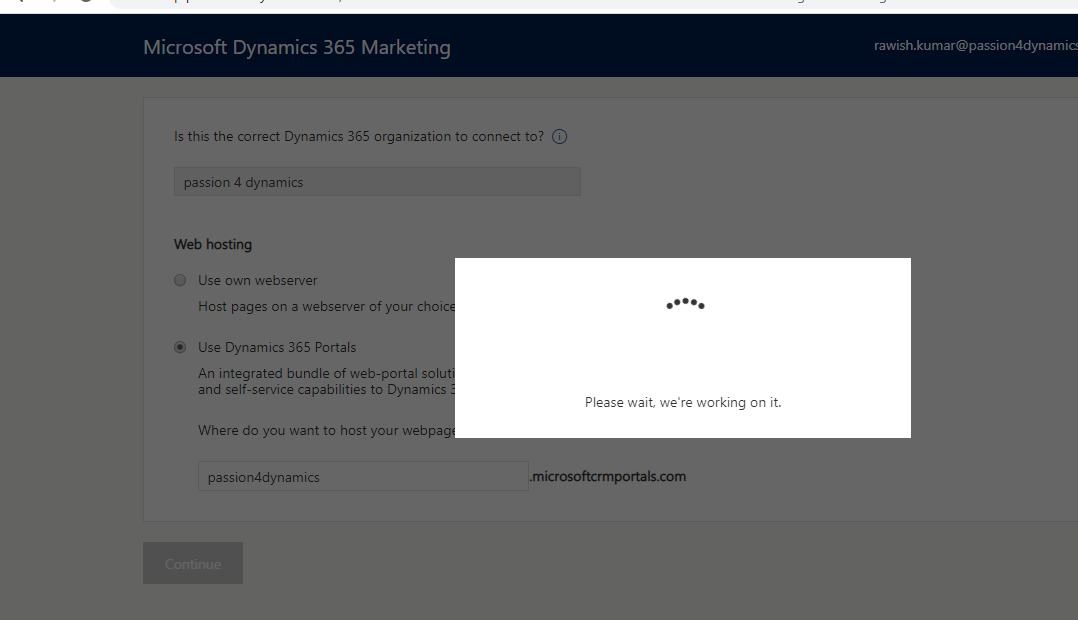
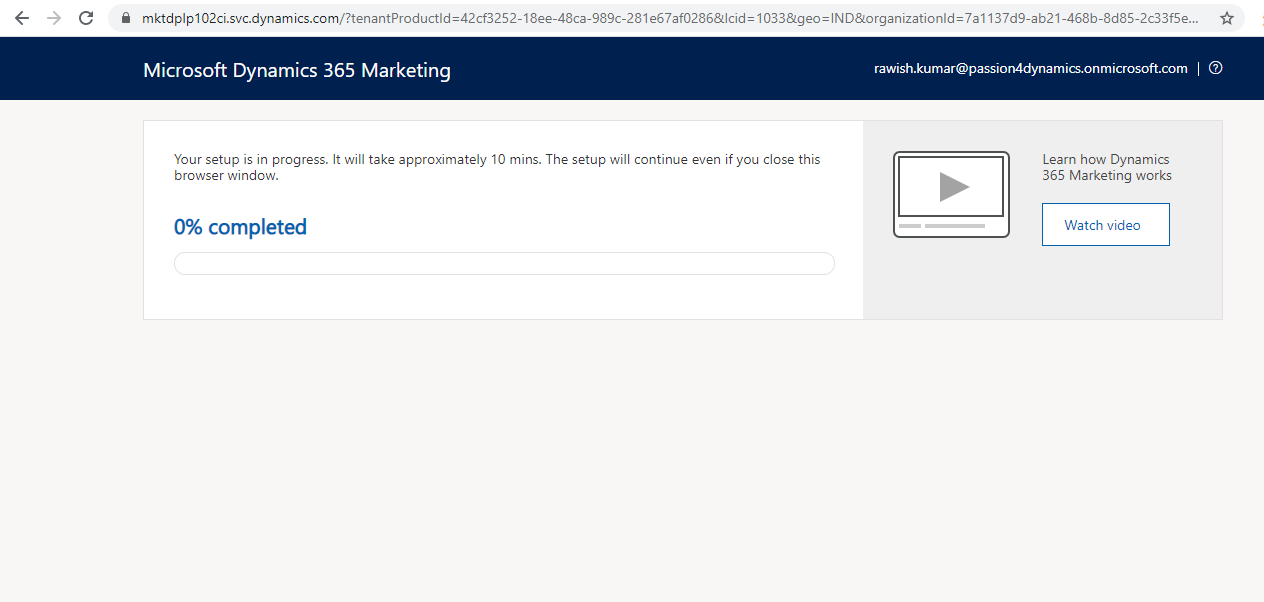
On the next screen, wait a few seconds:
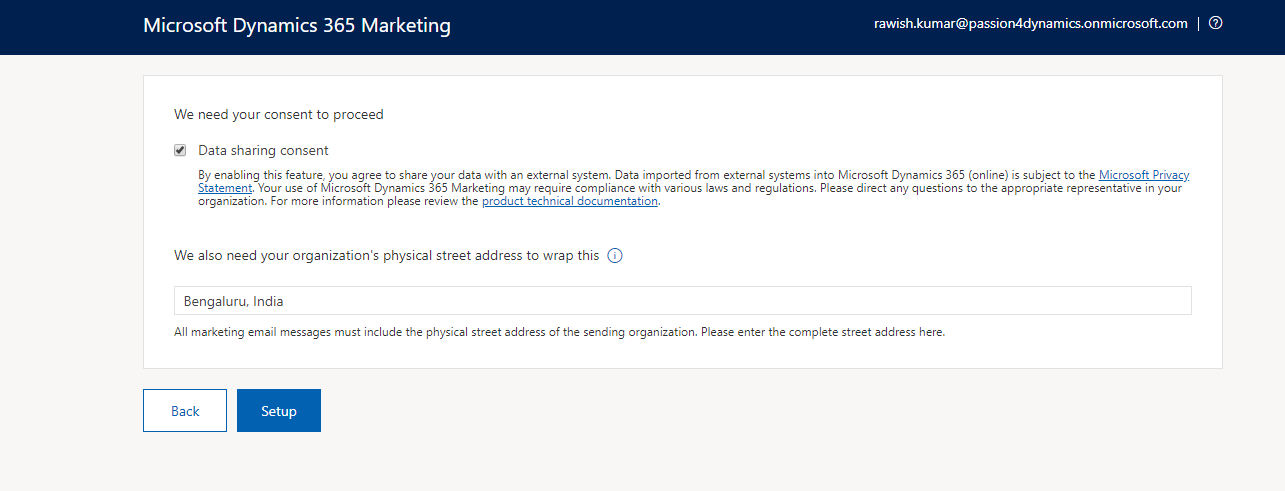
Another important step : You must provide a physical address of the organization ; In our case its a trial, you can put it in anything and also accept the data consent.
The installation will start, though it says it will take approx 10 mins, I would suggest you leave it for sometime and come back later.
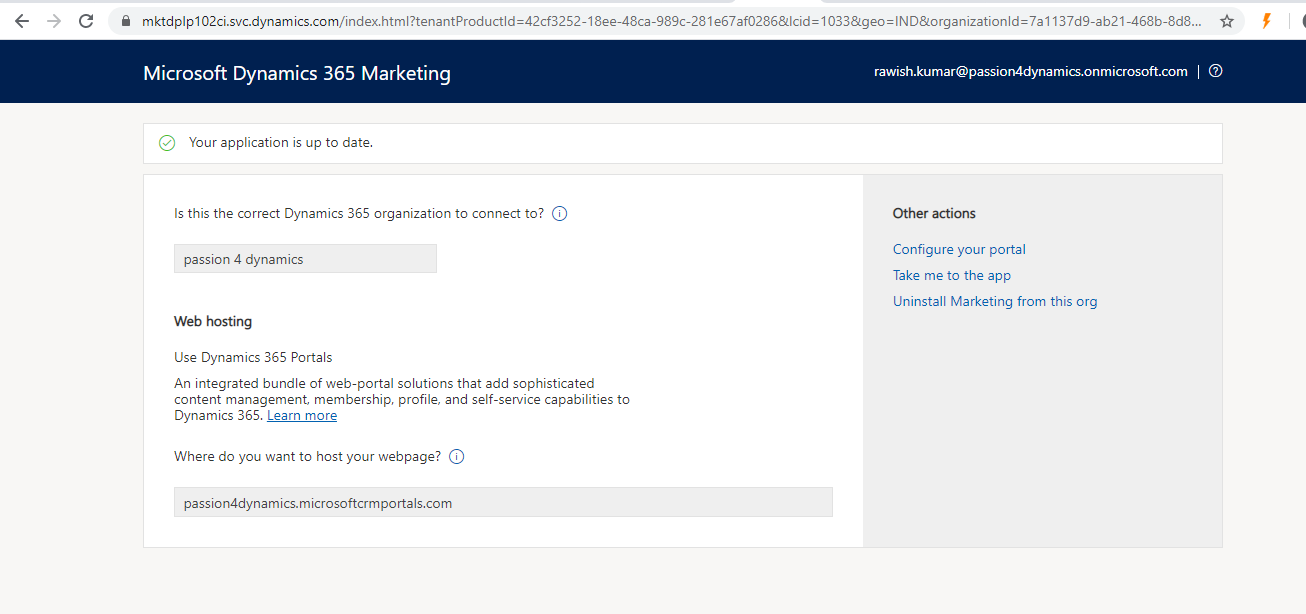
Once that is done, You will see something like below:
And its done! Now to access the app, you can click on “Go to app” from the above screen or simply navigate to “Marketing” App from your dynamics 365 instance navigation as it will start appearing post installation:
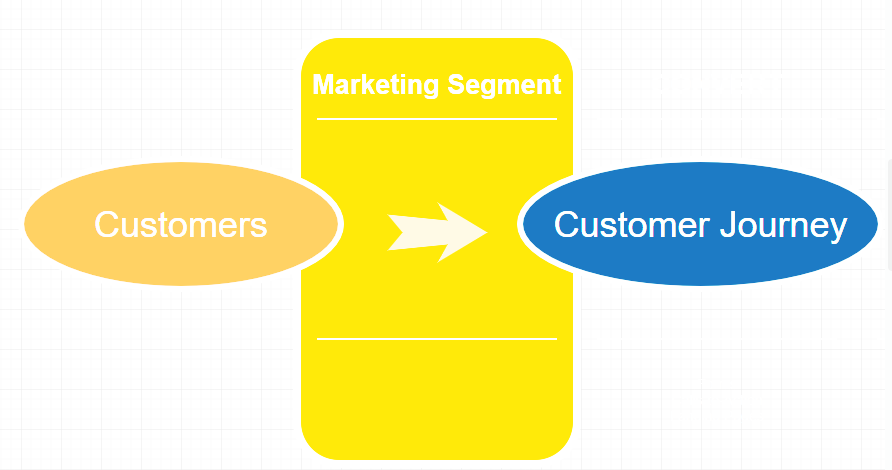
By now, we know that it’s not easy or straight forward to get any details from a customer journey from the back-end.
In a customer journey, customers are not directly added but rather through a “Marketing Segment”. Now we have seen in the blog above on how to get segment details used in the journey. Once we have the segment Id, the next step is to fetch the customers from the segment and for that I have another blog explaining it: Dynamics 365 For Marketing – Retrieve Contacts From A Segment
By doing the above mentioned, you should be able to get all customer that are part of a journey.
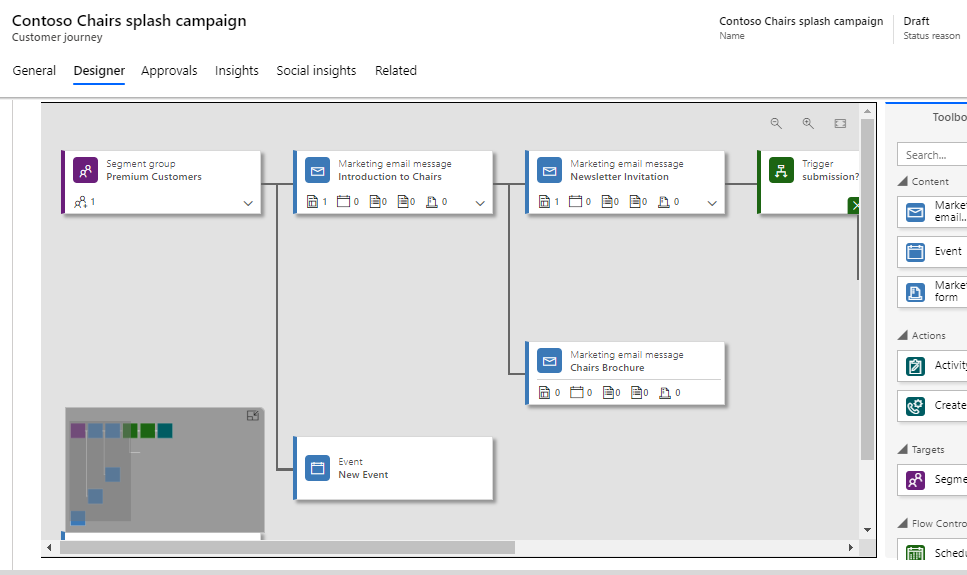
In today’s blog I am going to be talking about ‘Customer Journey’ entity in dynamics 365 for marketing app or to be specific the ‘Customer Journey Designer’ which looks like below:
I call it ‘Mysterious’ because whatever happens in the journey ‘stays’ in the customer journey. i.e there is no way or its difficult to get the segment/contents being used in it. I am talking about Marketing Email, Marketing Page, Marketing Form etc. The question you might want to ask is why would I need that information? well, because of may be below:
You might have some validations on the content you can use in the customer journey
You might want to retrieve the data for reporting purpose
If you look into the relationships from customer journey to these entities, you wont find anything hence it gets difficult to retrieve these records or perform operations. In short Dynamics 365 Marketing works a little differently then our typical dynamics 365.
Whatever happens inside a customer journey designer sits in a field on this entity named as “msdyncrm_workflowdefintion“. It stores information about content added in this the journey in JSON format.
This is how it looks:
Let’s understand what this JSON means:
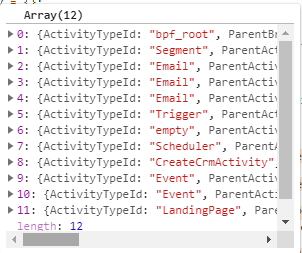
Each content is stored in a node called “ActivityTypeId“.
The Id of the content is stored in property “Itemid“.
To identify the type of content such as Marketing page form etc. refer to below table because it uses different names to each type of content:
Dynamics Entity Name
Internal Name In Customer Journey
Marketing Page
LandingPage
Marketing Form
MarketingForm
Survey
Survey
Marketing Email
Email
Marketing Event
Event
Marketing Segment
Segment
If you debug and parse this field data into JSON, looks like something below:
So when you retrieve/query this field, you have to loop through these JSON nodes and do validation using the Guids of these records like in the below example of Javascript:
 var workflowDefintion= formContext.getAttribute("msdyncrm_workflowdefinition").getValue();
 var workflowDefintionData = JSON.parse(workflowDefintion); //Parse it

                    var nodeLength = workflowDefintionData.length;
                    for (var i = 0; i < workflowDefintionData.length; i++) {
                        var node = workflowDefintionData[i];
                        /* Check if node is a Marketing page*/
                        if (node.ActivityTypeId === "LandingPage" && (i + 1) === nodeLength) {

// Perform Operations here
}
A segment in 365 for marketing app is an essential feature which lets you create a list of related contacts based on some criteria( similar to advanced find). Later it is used to target customers in a customer journey.
While you can define a criteria/search for contacts and add them in a Dynamic segment, you don’t have this facility in a “Static” Segment because contacts are manually added on a per-contact basis. hence, there should be ability to import these contacts in to a static segment.
Now, there is no out of the box way I could find by which we can bulk update contacts into a segment, however after doing a bit digging, I found a working custom solution.
Solution
If you look into segment entity, you will find a mysterious field named “msdyncrm_segmentmemberids” as below:
This field basically consists of the ids of the contacts in a JSON format prefixed with “crm”:
Hence, whatever contacts you manually select on the segment comes and sit in this field. So we just need to update this field with ids of the contact we want to include in this segment.
You can update this field either by WebApi or a Plugin. Its upto you how you want to design your solution. In my case I have placed button on the segment form which opens a web resource providing a flexibility to upload an excel/csv file containing these ids of the contacts which you can easily read, prepare the format of the guids(prefix with “crm”) and update using a simple web api request.
 var entity = {};
            var stringIfy = JSON.stringify(Prepared_ContactsArray);
            var entity = {};
            entity.msdyncrm_segmentmemberids = stringIfy;

            var req = new XMLHttpRequest();
            req.open("PATCH", GetGlobalContext().getClientUrl() + "/api/data/v9.1/msdyncrm_segments(" + segmentId + ")", true);
            req.setRequestHeader("OData-MaxVersion", "4.0");
            req.setRequestHeader("OData-Version", "4.0");
            req.setRequestHeader("Accept", "application/json");
            req.setRequestHeader("Content-Type", "application/json; charset=utf-8");
            req.onreadystatechange = function () {
                if (this.readyState === 4) {
                    req.onreadystatechange = null;
                    Xrm.Utility.closeProgressIndicator();
                    if (this.status === 204) {
                        //Success - No Return Data - Do Something

                    } else {
                        //Xrm.Utility.alertDialog(this.statusText);

                    }
                }
            };
            req.send(JSON.stringify(entity));
        }
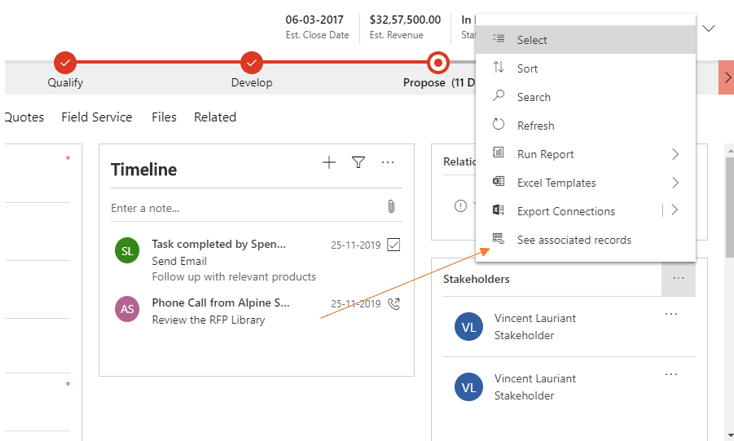
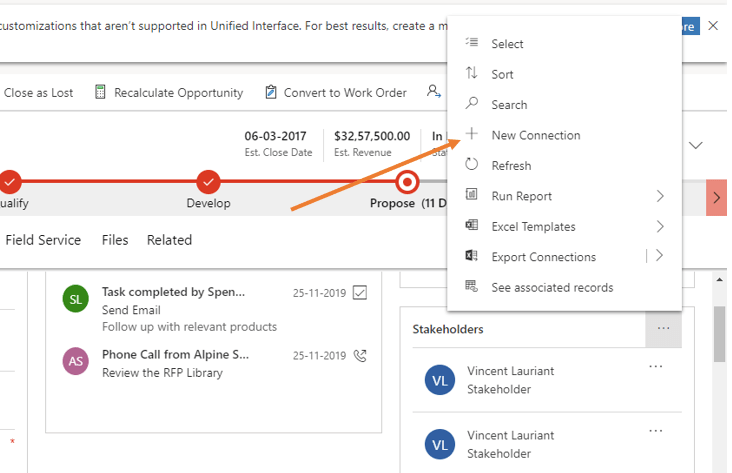
Out of the box on opportunity form, we have a connection sub grid named “stakeholders”. You can add new connections of type stakeholder from this subgrid which is amazing , however what if we need ability to create any other type connections from opportunity.
Connections ofcourse has inbuilt functionality for opportunity to behave this way. The subgrid uses a default view “All Stakeholders” hence it will let you add only stakeholder connections.
Let’s change this view to “All Active Connections” :
Select this view, save changes & publish the form. Lets see what happens now:
Strangely, we dont have a plus button , so person will have to click on see all records/see associated record and then add the connections from.
Solution:
I have found a workaround by playing around the ribbon workbench. 1. To do this, create a temporary solution and add “connections” entity to it.
3. Once you have download the solution, install the solution to your dynamics 365 instance.
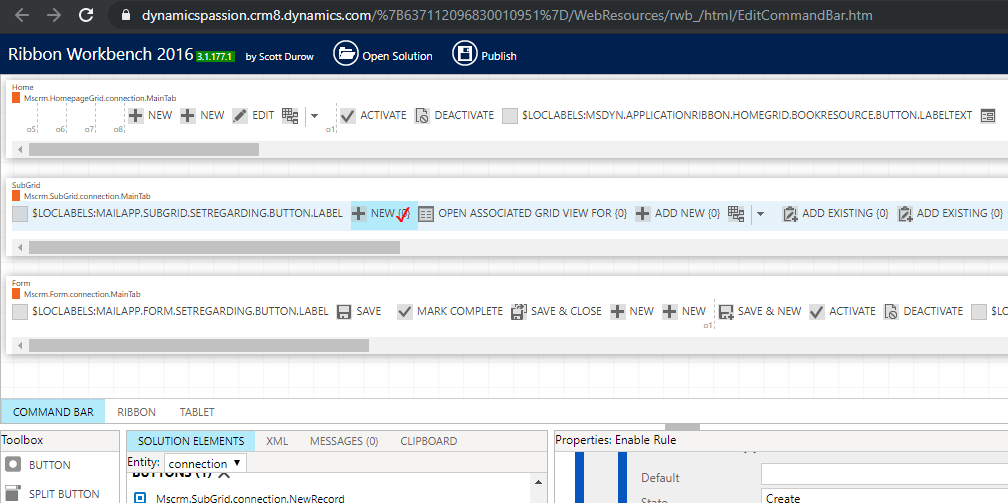
4. Click on the ribbon workbench button from your solutions are and select the newly create solution in the popup ( which we create for connection entity):
We are now going to make some ribbon changes, i would recommend to take a backup of the newly solution we have created so if anything goes wrong we can always import it back.
5. Right click on the +New button the subgrid ribbon and right on it. Select “customize button” then again right click and select “Customize command”:
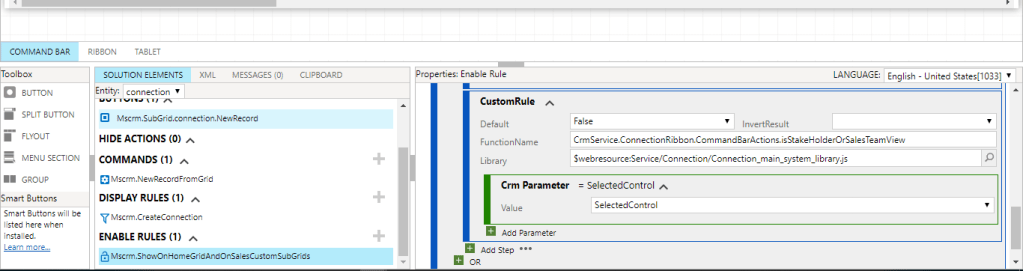
6. Now move to the enable rule “Mscrm.ShowOnHomeGridAndOnSalesCustomSubGrids” under command “Mscrm.SubGrid.connection.NewRecord” & scroll down to the “Custom rule” as shown below.
7. In this rule make “Default” field to “true” as well as Invert rule to true as well:
8. Now click on publish button from the ribbon workbench which will take some time.
9. Navigate to your opportunity now and you will the + button from subgrid now:
I hope this helps, here are some final notes:
Connections entity doesnt support quick create form hence do not expect it open a quick create on the right side when you click on this button. It will open a new window , you have fill details and click on save & close.
When new connection screen opens it will have opportunity in both connected to and connected from fields. You will have to apply basic javascript to clear one of the field so that user can select the customer /account in connected to field.
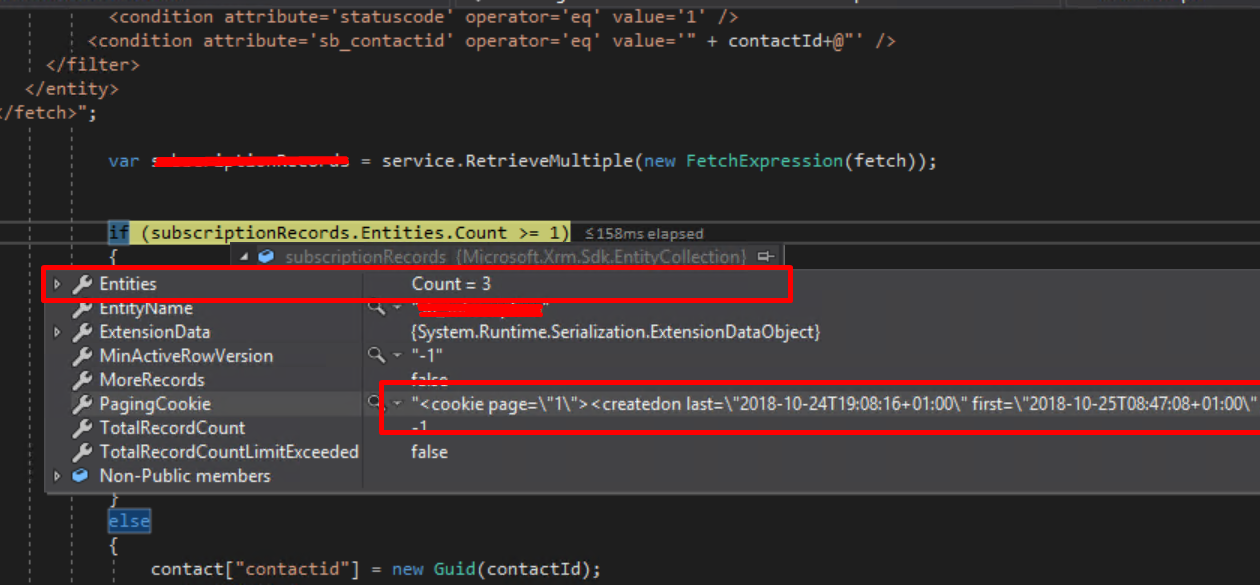
Sometimes, you may have a requirement to get the most recently created on record from the entity collection you have retrieved.
Instead of playing around a lot with coding and .net stuff, Dynamics CRM fetch XML and QueryExpression provides a way to sort records Ascending or descending.
Therefore, While retrieving records in FetchXML, do this :
QueryExpression qe = new QueryExpression(entityName);
FilterExpression fe = new FilterExpression();
qe.ColumnSet = new ColumnSet(true);
qe.Orders.Add(new OrderExpression(columnname, ordertype));
service.RetrieveMulti ple(qe);
when Execute them , you will get the desired record on the top which can be access by simply by doing retrievedResult[0] or :
In this blog i will detail on using Configuration Migration/ Data Migration utility. This can be used to move the configuration data from one CRM environment to other. generally Configuration data is used to defines custom functionality in CRM, which is typically stored in custom entities.
Often we need to migrate configuration data from one CRM environment to other, especially test data, master data setup etc. Microsoft provided an excellent tool for doing this.
Following are the benefits of using this tool,
allows you to select entity and fields from where you want to export the configuration data.
large amount of data from multiple entities can be moved from one crm environment to other.
Data can be imported using the same GUID’s as that of the source system, hence lookup references to imported records will be valid.
Schema file can be reused to export data from different source environments.